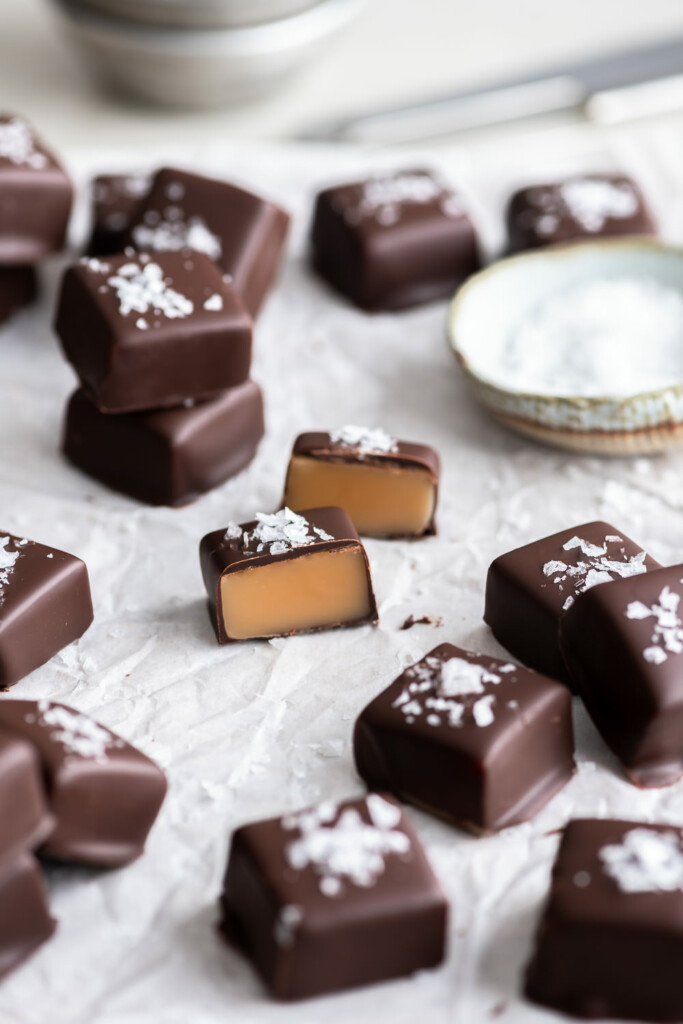
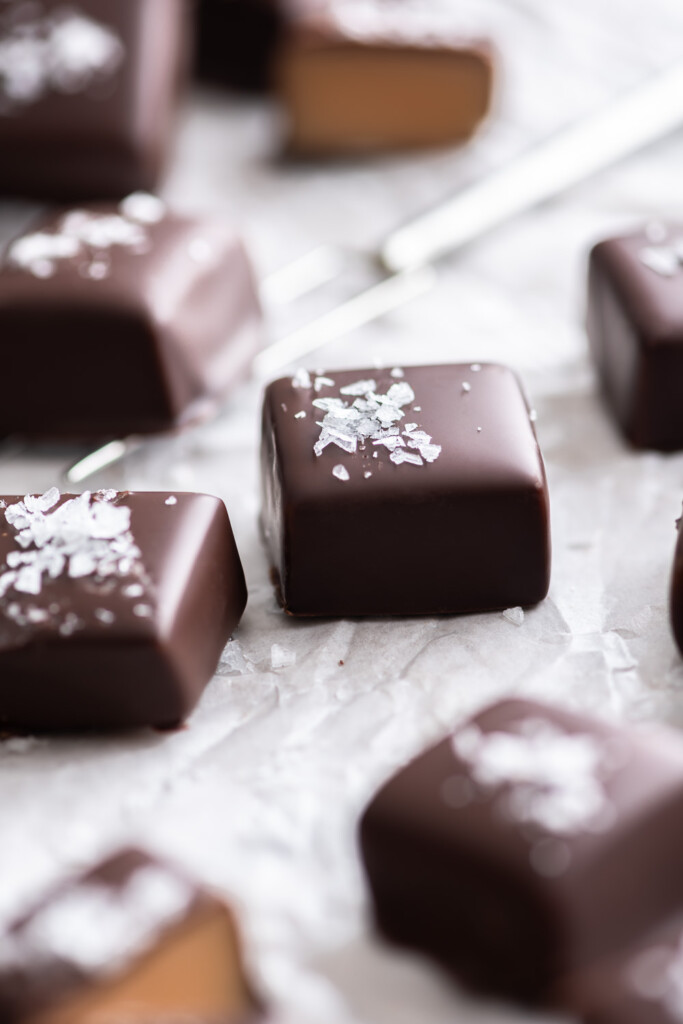
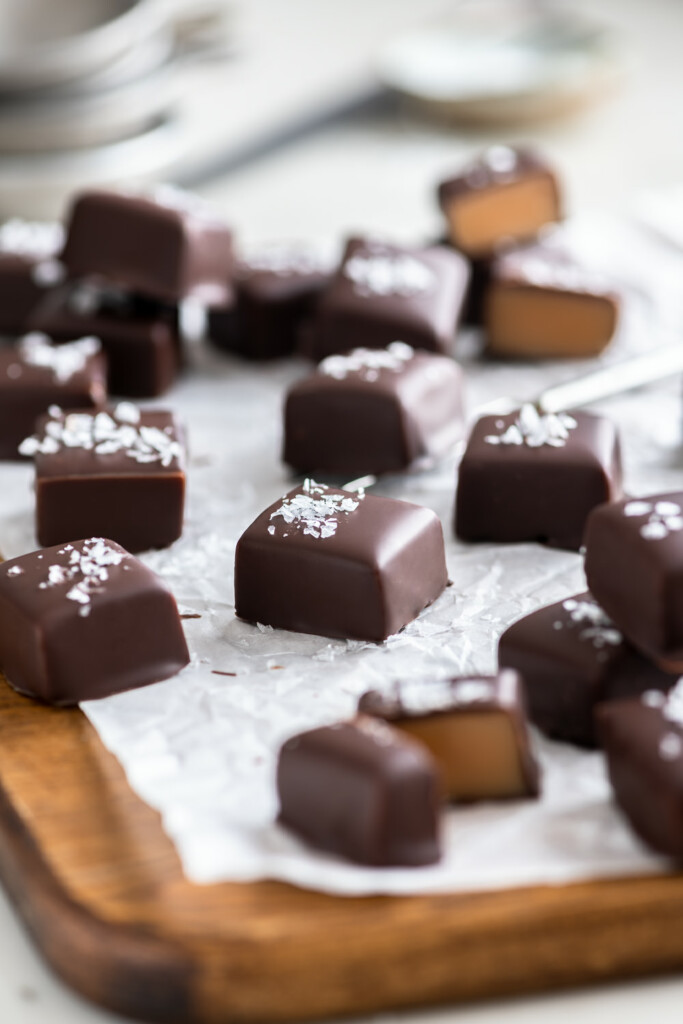
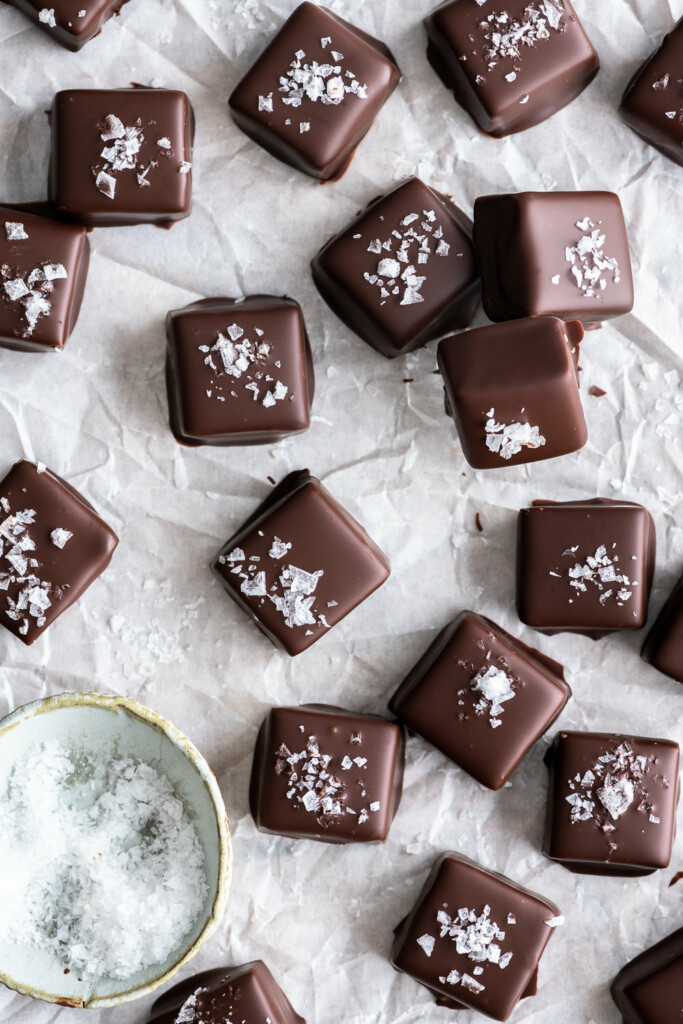
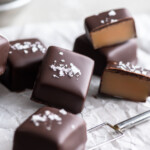
Chocolate covered caramels look and taste like they’re straight from a candy shop! Buttery soft vanilla caramels, thick flakes of sea salt and a thin, shiny coating of dark chocolate come together to the most stunning homemade candy.
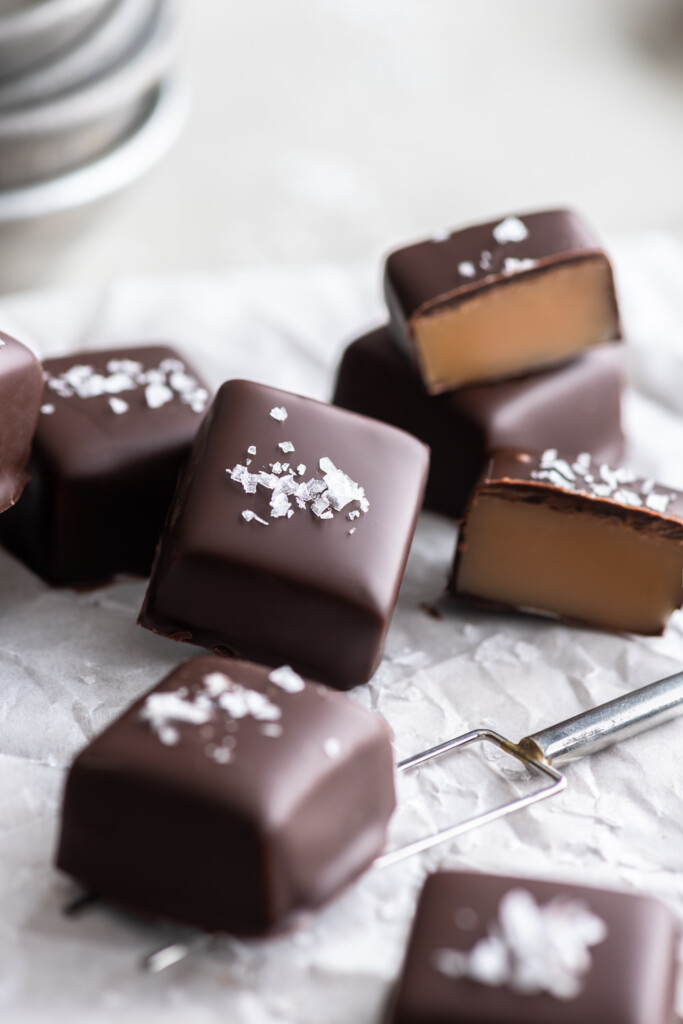
Learn how to make the best soft caramels, and then the easiest way to dip the caramels in tempered chocolate for a super professional homemade candy! Is there any better way to say "I love you" to friends and family?!
This post may contain affiliate links. As an Amazon Associate, I earn from qualifying purchases.
what you need to make chocolate covered caramels:
- heavy cream
- sugar
- butter
- corn syrup
- vanilla extract
- flaky salt
- tempered chocolate
how to make soft caramels covered with chocolate:
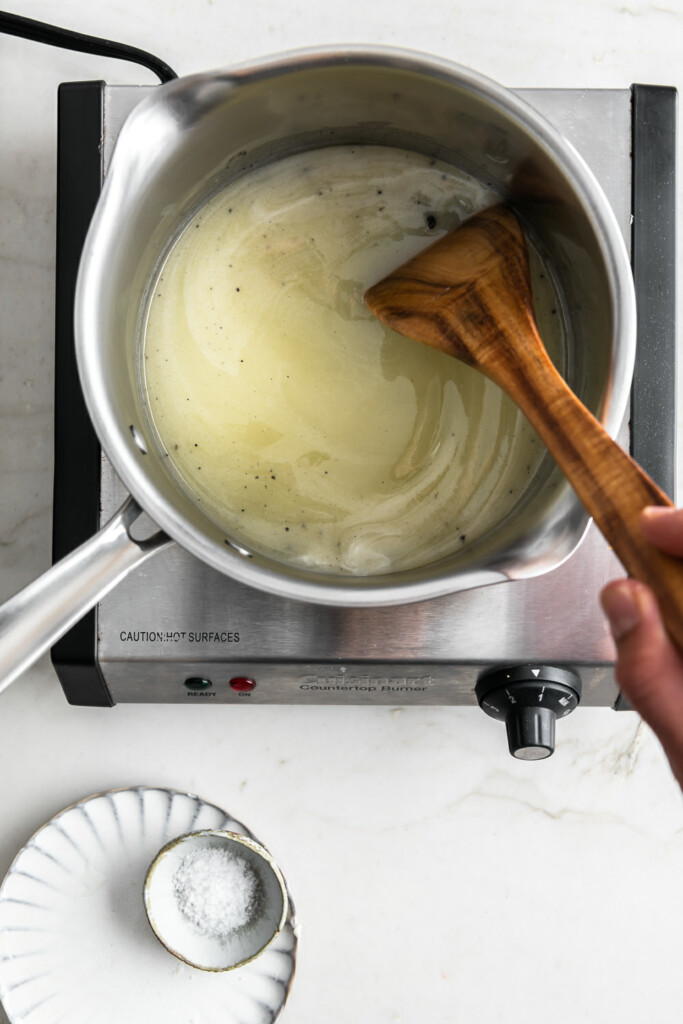
- Combine cream, sugar, butter, and corn syrup in a large saucepan.
- Gently heat until everything is melted.
- Cook over medium heat, stirring often, until caramel reaches 245°F.
- Stir in sea salt and vanilla.
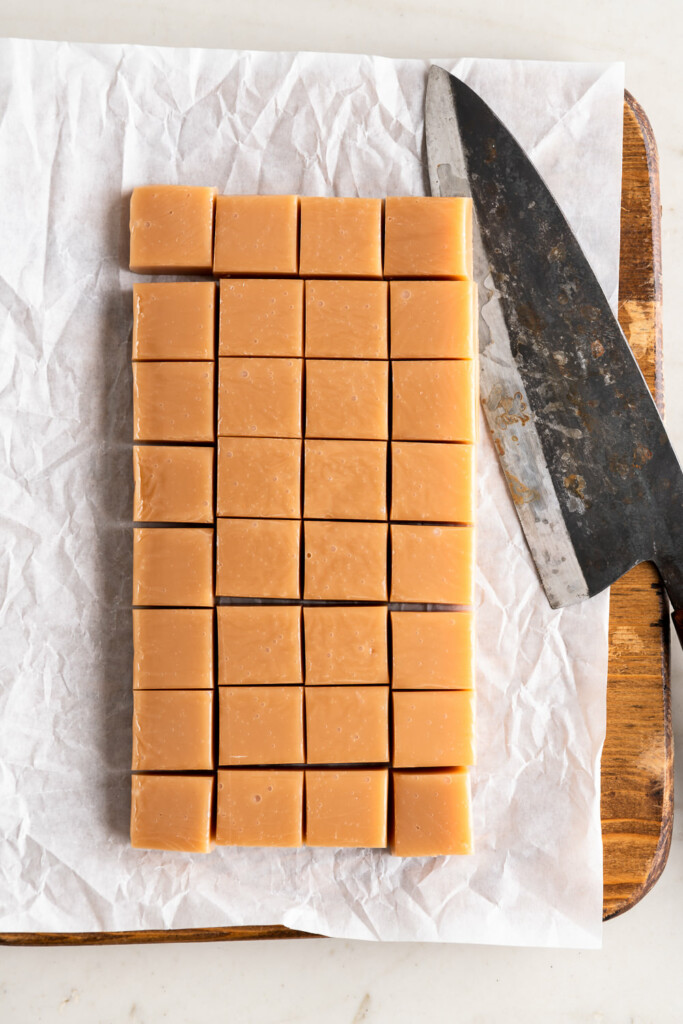
- Pour caramel into a lined loaf pan; let sit 4- 6 hours (or overnight) to fully harden.
- Pull out the caramel slab, cut into 1-inch squares.
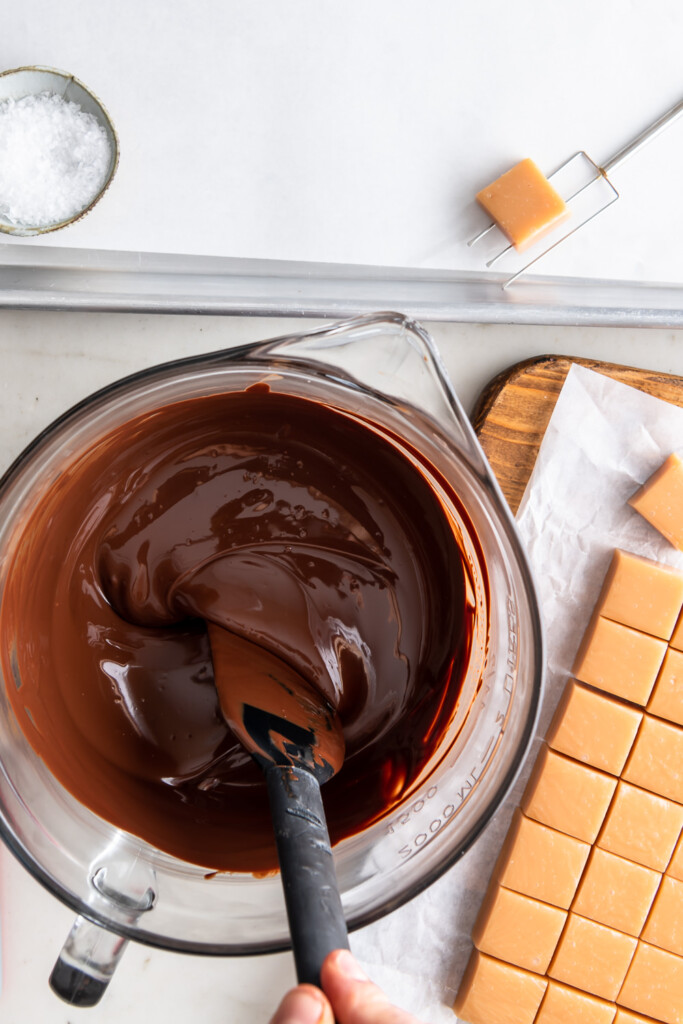
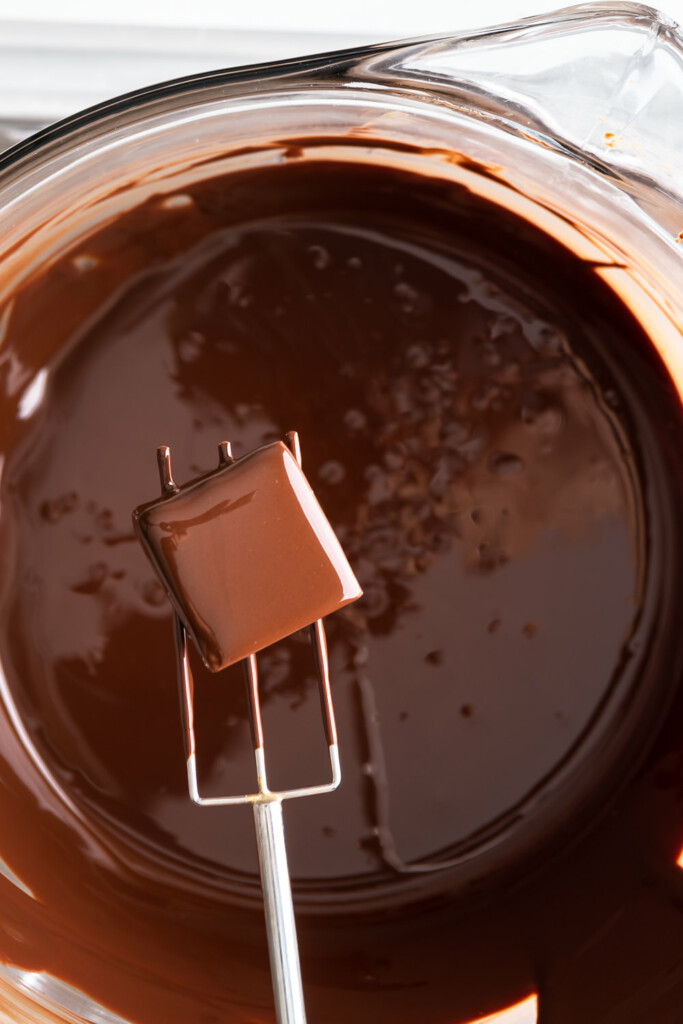
- Temper the chocolate.
- Dip the caramels in chocolate, sprinkle with sea salt, let set.
- Enjoy!


how much chocolate do I need to temper for these caramels?
Each 1-inch square caramel needs about 0.1 ounces of chocolate to be fully coated. Dipping a whole batch of caramels will use about 4 ½ oz of chocolate.
That being said, it’s SO important to have excess chocolate so that you can comfortably submerge the caramels. This will give you a smooth, even coating and it will make the process much easier.
I prefer to temper at least 12 oz of chocolate for this quantity of caramels.
Keep in mind that larger quantities of chocolate also maintain the temperature better, so the batch will stay tempered longer. And there’s ZERO harm in tempering more than you need. Just pour the extra unused chocolate on a piece of parchment, let it set, and store it for another time.
timeline for these chocolate caramels:
I prefer to divide this chocolate covered caramel recipe into 2 days.
Day 1:
- I make the caramels and leave them in the pan, uncut, overnight. Cover with plastic wrap to protect from humidity.
- Let the caramels fully set: at least 6 hours or overnight.
Day 2:
- Cut the caramels just before you’re ready to coat in chocolate. This keeps the shape perfectly square. If you let the cut caramels sit out for a day, they will slowly ooze into a square with soft corners. And those just don’t look nearly as stunning. You’ll also minimize exposure to air. All of those cut edges have the potential to suck up moisture from the air and get sticky!
- Prep your dipping forks, thermometer, spatula, parchment paper lined baking sheet and sea salt.
- Temper the chocolate, dip and sprinkle with salt!
tips for chocolate dipping success:
- Tempered chocolate is crucial! It will give a smooth, hard, snappy coating to your caramels that won’t melt in your fingers. Learn how to properly temper chocolate here.
- Wait a few minutes after dipping the caramels in chocolate before sprinkling on the sea salt. If you add the salt too soon, it will dissolve into the chocolate. If you wait too long, the chocolate will set and the salt won’t stick. I like to dip 2- 3 caramels, then go back and salt them.
- Set up your area, temper the chocolate, then work quickly. Once your chocolate is tempered, it won’t stay that way. If you’re not prepared, the chocolate will cool and harden before you’ve dipped all of your caramels. Stir the chocolate and gently warm it with a hair dryer, or place it on a warm heating pad, to keep it around 90°F. I share more chocolate tempering tips here.
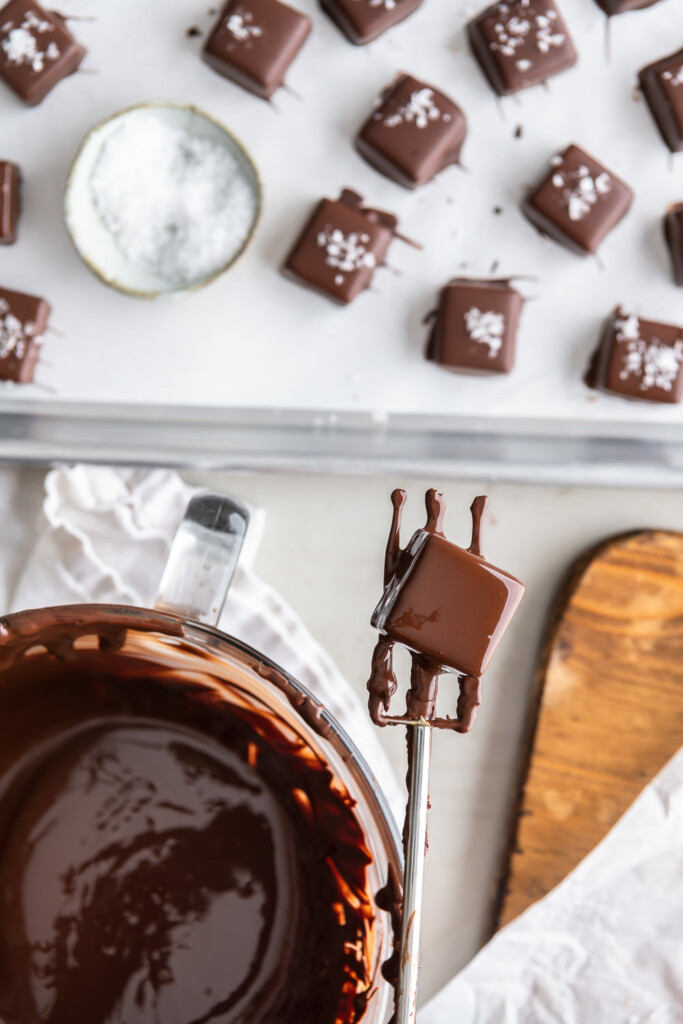
- I love these 3-tine dipping forks! You could absolutely use a regular fork, but the thin tines on these chocolate dipping forks help you get a thin coating on the bottom. They also make it super easy to slide the caramels onto the parchment.
how to avoid the chocolate foot:
Be kind with yourself as you practice dipping and coating these dark chocolate sea salt caramels. It’s an art and it takes a few trials to figure out how to get a thin coating without the dreaded chocolate “foot” (the excess chocolate that pools at the bottom of the dipped candy).
I prefer to tap the caramels 3- 5 times, then scrape the bottom against the edge of the bowl. Dipping forks are really helpful here because they’re much thinner than a standard salad fork. This means you can scrape more excess chocolate off the bottom and minimize the foot.
I have a tendency to be a perfectionist, and my mom used to remind me that people can buy perfect from a store. Part of the charm of a homemade item is the imperfections. You can absolutely make chocolatier-level candies at home. With practice, they will look perfect. But I try to embrace the foot every now and then.
How else will your friends know you didn’t just order these delicious candies from Amazon, but you actually turned butter and sugar into something crazy delicious and beautiful? Aim for perfect, but be happy with delicious!
how to store chocolate covered caramels:
Store dark chocolate sea salt caramels in a cool, dry place for up to 1 month. I prefer to keep them in a ziptop bag on the counter, but any container that basically keeps the bugs out will work!
Properly tempered chocolate will protect the caramel candies from moisture in the air and extend their shelf life considerably. No refrigeration is necessary, and in fact, it will cause the chocolate to bloom and lose its shiny, smooth, beautiful appearance.
more homemade candy recipes to try!
chocolate holiday bark with amaretti cookies
Watch our Christmas candy web story here!
chocolate covered caramels with sea salt
These chocolate covered caramels are extra buttery, rich, and soft, and they're coated with a shiny layer of dark chocolate and a sprinkle of sea salt!
- Prep Time: 30 minutes
- Cook Time: 30 minutes
- Total Time: 1 hour
- Yield: 28
- Category: Candy
- Method: Stove
- Cuisine: American
Ingredients
- 1 cup heavy cream
- 1 cup granulated sugar
- 3 tbsp butter
- ½ cup corn syrup
- 1 tsp vanilla extract
- ½ tsp flaky salt, plus more for sprinkling
- 12 oz tempered chocolate
Instructions
- Butter a 9-inch x 5-inch loaf pan and line with a parchment paper sling. Butter the parchment paper and set aside.
- Combine heavy cream, sugar, butter, and corn syrup in a large saucepan over medium-low heat. Cook, stirring, until sugar is dissolved and butter is melted.
- Bring to a boil, then reduce heat to medium and cook, stirring often, until syrup reaches 245°F, about 15 minutes. Make sure to stir and watch closely to prevent bubbling over in the beginning and scorching towards the end.
- Remove from heat, stir in the salt and vanilla extract. Pour hot caramel into prepared pan; let sit at least 6 hours to fully harden.
- Use a sharp knife to cut along edges of the pan, then pull up on the parchment paper sling to remove caramel slab from the pan. Transfer to a cutting board and cut caramels into 1-inch squares.
- Line a baking sheet with parchment paper. Temper the chocolate.
- Use a chocolate dipping fork to fully submerge the caramel, then raise the fork and tap 3-5 times to let excess chocolate drip off. Scrape the bottom of the fork against the bowl to remove more chocolate, then slide the caramel onto prepared baking sheet.
- Let sit about a minute, then sprinkle with sea salt. Repeat dipping and salting remaining caramels. The tempered chocolate will continue to crystallize and harden over the next few days. Store in a cool, dry place.
Notes
Nutritional information is only an estimate. The accuracy of the nutritional information for any recipe on this site is not guaranteed.
Nutrition
- Serving Size: 1
- Calories: 110
- Sugar: 14g
- Sodium: 59mg
- Fat: 5.7g
- Saturated Fat: 3.6g
- Unsaturated Fat: 1.7g
- Trans Fat: 0.2g
- Carbohydrates: 15g
- Fiber: 0.3g
- Protein: 0.5g
- Cholesterol: 13mg
Nur says
I tried making caramel using your recipe. My daughters love it very much. It's not too sweet, just right.
Foot of chocolate is one thing I need to practice. Thank you very much.